Tabi socks!
This will probably be my last post before leaving for Italy, so I thought I'd make it count. Here, as promised, is my very own pattern for tabi (two-toed) socks!

A few words of disclaimer: I made these socks especially for my feet. I wear size 7.5 shoes and my feet and ankles are fairly narrow. My right foot is smaller than my left. We sock knitters know that the great thing about making your own socks is that you can fit them to your own idiosyncratic body measurements. My tabi turned out unapologetically asymmetrical because it was more important to me that they fit perfectly than that they match perfectly.
Measure the length of both your feet. You may not have as big a difference between your feet as I do (almost half an inch). I still recommend knitting for your bigger foot first. You will also want a yarn that frogs well, and you will want to do the toe parts somewhere you can try your socks on over and over.
First, the lace pattern. I call it "diamond scales" because it looks like diamond-shaped scales. In my more honest and self-depricating moments I call it "artichoke leaves." It's pretty even if it does look like a vegetable.
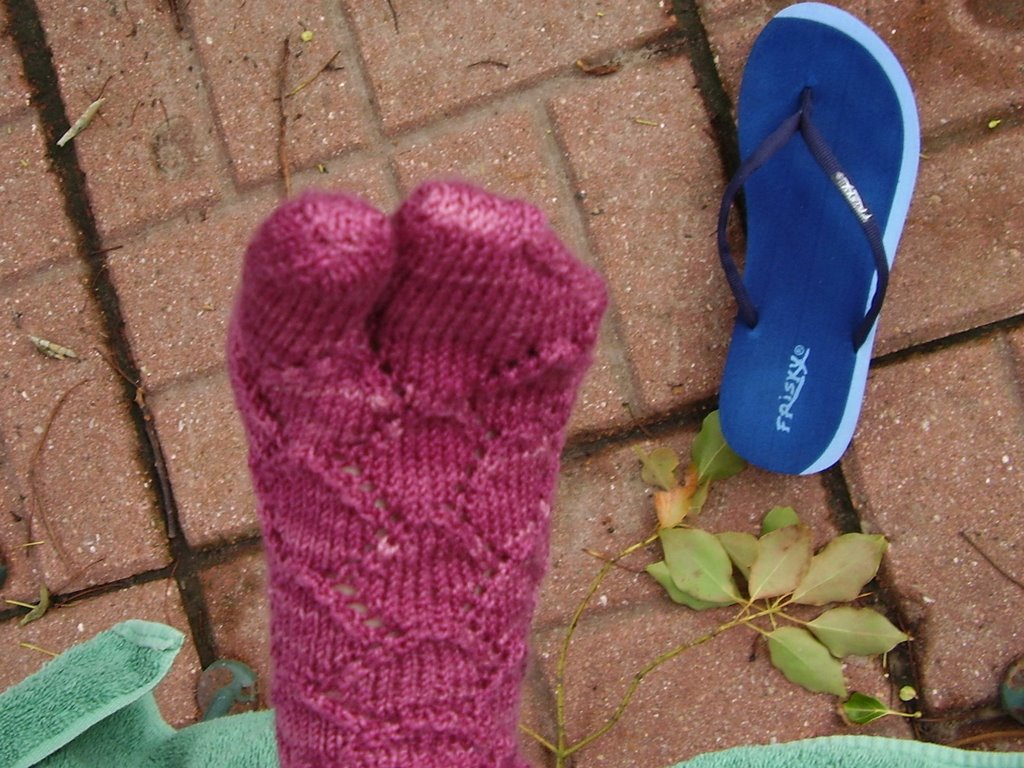
I used Koigu KPM semi-solid in #1165, a sort of raspberry shade. On size 1 needles my gauge was 7.5 SPI so I came up with this 14-st repeat.
CO a multiple of 14 sts.
Row 1: Knit
Row 2: K4, k2tog, yo, k2, yo, ssk, k4
Row 3 and all odd-numbered rows: K all sts
Row 4: K 3, k2tog, yo, k4, yo, ssk, k4
Row 6: K2, k2tog, yo, k6, yo, ssk, k2
Row 8: k1, k2tog, yo, k8, yo, ssk, k1
Row 10: k2tog, yo, k10, yo, ssk
Row 12: k2, yo, ssk, k6, k2tog, yo, k2
Row 14: k3, yo, ssk, k4, k2tog, yo, k1
Row 16: k4, yo, ssk, k2, k2tog, yo, k4
Row 18: k5, yo, ssk, k2tog, yo, k5
Row 19: K
Rep. rows 4-19.
The sock itself:
CO 56 sts. I recommend using 4 dpns because I liked it.
Work 1" in 2x2 rib.
Beg. lace patt.
I did two full repeats before the heel because I was worried about running out of yarn, but you can make your cuff longer or shorter as you like.
Heel: using 28 sts, work the heel flap and heel turn however you like. I used the dutch heel from Nancy Bush's Folk Socks.
Pick up gusset. If you're using 4 dpns like all the cool people, arr. your sts like this:
Needle 1: left half of heel and gusset/hereafter sole
Needle 2: left half of instep
Needle 3: right half of instep
Needle 4: right half of sole
While shaping the gusset the way you needed to as it pertained to your heel, work the artichoke pattern on needles 2 and 3, and the sole (1 and 4) in stockinette for the comfort of your pretty feet.
Ok, fast forward (about 4 repeats on my sock) to the part where you're ready to do the toe. You should end with the last lace round, not with an all-knit round. We'll do the left foot first, because that's what I did.
BIG TOE
Work 5 sts of needle 1 and transfer those and all the sts on needle 4 to a st holder or waste yarn (19 sts on waste yarn). Work the remaining 9 sts of needle 1, and the first 9 sts of needle 2. Transfer the last 5 sts on needle 2 and all the sts of needle 3 to another holder. You now have 18 sts on two needles. CO 3 sts using backwards loop for a total of 21 sts. Shift these around so that needle 3 holds 2 sts from the instep, the 3 co sts, and 2 sts from the sole, and needles 1 and 2 have 7 sts each.
Still with me?
Work the toe in the round until you get to the point where the toe starts to taper. On me this was row 11.
Row 12: *k5, k2tog* 3 times. 18 sts.
Row 13: knit
Row 14: *k4, k2tog* 3 times. 15 sts.
Row 15: knit
Row 16: *k3, k2tog* 3 times. 12 sts
Row 17: *k2, K2tog* 3 times. 9 sts.
Row 18: *Sl 1, K2tog, psso* 3 times. 3 sts.
Break yarn, run it through the sts and weave in the end. Try the sock on again. Pretty!
4-TOE
Once you're all set up, the beginning of the round will be between the toes. Needles 1 and 2 will have the top of the foot and needles 3 and 4 will have the bottom. As you're moving sts of your holder, put 8 on 1, 11 on 2, 11 on 3, and 8 on 4. With the new yarn leave a really long tail and knit all the sts. At the end of the last needle PU 4 sts from the cast-on edge of the big toe. You will want 2 of these on needle 4 and 2 on needle 1 for a grand total of 42 stitches. Hey, 42 is, after all, the Answer to the Ultimate Question.
Think about the way a regular sock with a wedge toe fits. If yours fit like mine and most of the pics I've seen, the part with the decreases goes all the way up the four toes and the kitchenered part only goes across the second and big toes. In order to recreate that here we're going to need a steeper slope, so you'll move from the decrease-every-other-round to decrease-every round a lot sooner.
You ready? Those last stitches you knit were round 1, here goes round two
Decrease row:
Needle 1: k
Needle 2: k to last 3 sts, k2tog, k1
Needle 3: k1, ssk, knit rest of sts
Needle 4: k
As you decrease you will occasionally need to redistribute the sts so that you still have 4 needles to work with. Work the decreases every other row until you get to the top of your fourth toe (the one next to your pinkie). On my foot this was row 12 and I had 30 sts left. Now work the decreases every round until your second toe is just barely peeking out. This was my row 19 and I had 8 sts left. Break the yarn, leaving yourself a long tail, and use kitchener to graft the live sts.
Weave in all the ends and be very careful to get rid of the gaping holes between the toes. Or maybe you're better at that sort of thing than I am.
Tada! one sock down! Admire and begin sock 2.
Everything about sock 2 will be the same until (duh) you get to the toes. Because you are working on your smaller foot here, you can start the silly stuff a little earlier without too much of a problem.
Right foot, big toe
I worked the last lace round but stopped 5 sts before the end of needle four. I transferred these five sts and the 14 sts of needle 1 to a st holder and did the same with their buddies on needles 2 and 3. I have:
9 sts on what used to be needle 3 and is now needle 1
9 sts on what used to be needle 4 and is now needle 2
Cast on 3 sts using backwards loop and piddle around until you have the same distribution as you did on the other big toe: needle 3 has the 2 sts from the sole, 3 new sts, and 2 sts from the top of the foot. Work this toe just the same as the other big toe, although you may want to start the decreases sooner if there's a big difference in size.
Right foot, 4-toe
You can work this just the same as you did on the other foot, pretty much. But I wound up with so much extra space that when I had 24 sts left I started working decreases on both sides (the outside and between the toes). Like so:
Needle 1: K1, ssk, knit the rest
Needle 2: k to last 3 sts, k2tog, k1
Needle 3: K1, ssk, knit the rest
Needle 4: k to last 3 sts, k2tog, k1
I did this 2 times so I had the same number of sts (16) as I kitchenered before. Do all the necessary finishing, put on your flip flops, and run around the neighborhood proclaiming your success!
A note on the flip flops: I needed some new ones, so Mom and I went shopping at all the local surf shops in search of the perfect pair. I found some great black ones but they were a little casual so I kept looking around. Blue is my favorite color so these caught my eye. I tried them on.
Me: "Mom, you know what would go really well with these flip flops?"
Mom: "Jeans?"
Me: "Raspberry toe socks!"
And with that, I had to have them.
Arrivederci, everybody! Thanks for all the encouragement on getting this pattern up! You'll hear from me again once I've located an internet cafe in Florence!
posted by Liz @ 11:03 AM
3 Comments
![]()

3 Comments:
Thanks! I will have to try these. Ciao!
Awsome! I have been looking for a pattern like this. May I Put a link to it on my website?
Thanks:)
Ang
thanks a lot for sharing the pattern! (I'm ptoledod at Socktoberfest's Flickr goup)
Post a Comment
Subscribe to Post Comments [Atom]
<< Home